What Are Hamster Burrow Starters and How to Set Them Up?
Hamsters, like many small animals, are natural burrowers. In the wild, they dig tunnels to create a safe space for nesting, storing food, and avoiding predators.
Recreating this natural behavior in captivity is essential for their mental and physical health, and one of the best ways to do so is by providing a hamster burrow starter.
What is a Burrow Starter?
A burrow starter is a structure or material placed in a hamster’s cage to initiate burrowing. It provides a stable foundation and a point of entry for your hamster to begin creating tunnels.
In the wild, hamsters are expert diggers, creating elaborate tunnel systems that serve several purposes: they offer shelter, store food, and provide a safe space for retreating when feeling threatened. A burrow starter mimics this natural behavior, encouraging your hamster to dig and build its own tunnels.
Main Types of Hamster Burrow Starters
The starter is typically made from safe, chewable materials, such as cardboard, wood, or natural grasses, and it may come in the form of tubes, logs, or other types of shelters that allow hamsters to dig, burrow, and nest.
1. Cardboard Tubes
Cardboard tubes are one of the most accessible and affordable options for creating burrows. They mimic the tunnels hamsters would create in the wild.
- Types: Toilet paper rolls, paper towel rolls, or cardboard tubes from packaging.
- Benefits: Easy to obtain, safe for chewing, and ideal for DIY projects. Cardboard tubes can be cut to size and placed horizontally or partially buried in bedding to create a burrow entrance.
- Considerations: Ensure the tube is free from harmful inks or chemicals. The hamster may chew on the tube, which is generally safe but requires monitoring.
2. Plastic Tubes
Plastic tubes are often used in modular cage systems and are available in various sizes and shapes. These tubes serve as tunnels for hamsters to crawl through and create burrows in.
- Types: Transparent or opaque plastic tubes, often used as part of a larger modular habitat.
- Benefits: Durable, easy to clean, and can be part of a multi-tunnel system. Plastic tubes often connect different areas of a hamster’s enclosure.
- Considerations: Plastic tubes don’t provide the same natural experience as cardboard or wood but are convenient for cage layouts.
3. Wooden Tunnels
Wooden tunnels are often made from natural, untreated wood and are designed to offer a more authentic burrowing experience for hamsters.
- Types: Hollowed-out logs, natural wood tunnels, or wooden log rolls.
- Benefits: Wooden tunnels offer a more natural environment, provide chewing opportunities to help maintain dental health, and are sturdy for digging.
- Considerations: They can be heavier than cardboard or plastic tubes, and hamsters may not dig as deeply in them, but they are great for nesting.
4. Grass Tunnels
Grass tunnels are made from woven natural grass or other plant materials, providing a soft, burrowable option that encourages natural behaviors.
- Types: Woven grass tunnels or woven hay structures.
- Benefits: These tunnels are safe to chew on and mimic the type of materials hamsters would use in the wild. They also promote nesting and burrowing.
- Considerations: Grass tunnels may wear down more quickly than wood or plastic options but are ideal for hamsters that enjoy natural textures.
5. Hollow Logs and Natural Shelters
Hollow logs or natural shelters are excellent burrow starters, offering a more complex burrowing structure. These items are often made from real wood, ceramic, or safe, natural materials.
- Types: Hollow logs, ceramic burrow entrances, or multi-chambered natural shelters.
- Benefits: These provide a cozy, natural burrow area and help your hamster feel more secure. They offer multiple layers of burrowing space and are highly durable.
- Considerations: These types of burrow starters are typically larger and more expensive than basic tunnels, but they can be a great addition for larger enclosures or hamsters that prefer a more substantial nesting area.
6. Flexible or Collapsible Tunnels
Flexible or collapsible tunnels are made of soft materials like fabric or plastic that can bend and shape into various configurations. These tunnels are often used in combination with other burrow starters.
- Types: Soft, fabric tunnels or flexible plastic tunnels.
- Benefits: These tunnels are great for creating an adaptable and expandable tunnel system that can fit a hamster’s needs. They are easy to move and rearrange and offer variety for the hamster.
- Considerations: While they’re ideal for temporary use, these tunnels may not be as sturdy as more rigid options like wood or plastic tubes.
7. Bedding and Substrate Burrow Starters
In addition to tunnel-based burrow starters, some burrow starters come in the form of bedding or substrate that’s specifically designed to encourage digging and burrowing.
- Types: Special burrowing substrates, like sand, dirt, or extra-deep bedding.
- Benefits: The deep, loose bedding provides ample space for hamsters to dig and create tunnels. Materials like sand, hay, or soft paper bedding encourage digging, and hamsters enjoy the texture.
- Considerations: Ensure the bedding is safe and non-toxic for your hamster. Some types of bedding, such as clay-based or sandy substrates, may not be suitable for all hamsters, especially those prone to respiratory issues.
The right choice depends on your hamster’s behavior, preferences, and your desire to create a natural or more controlled environment.
How to Set Up the Burrow Starter
After acquiring or creating a burrow starter, you’ll want to ensure it is properly integrated into your hamster’s habitat:
1. Choose the Right Cage
The first step in setting up your hamster’s burrow starter is selecting an appropriate cage. The cage should be large enough to accommodate bedding depth, tunnels, and enough space for your hamster to explore and move freely.
- Cage Size: Aim for at least 450 square inches of floor space for a single hamster. Syrian hamsters typically require larger cages, while dwarf hamsters can manage with slightly smaller ones.
- Ventilation: Ensure the cage is well-ventilated to allow airflow and prevent moisture buildup.
- Type of Cage: A large, wire cage with a deep plastic base works well for burrowing. Avoid aquariums or tanks without proper ventilation, as they can trap moisture.
Step 2: Add the Bedding
The bedding material forms the foundation for burrowing. To encourage your hamster to dig and create tunnels, you need deep, soft, and absorbent bedding that holds its shape.
For effective burrowing, add a minimum of 4 to 6 inches of bedding to the cage. This allows your hamster enough space to dig and create tunnels. Options like shredded paper, aspen shavings, Carefresh, and hemp bedding are ideal. Avoid using cedar or pine shavings, as they contain oils that are harmful to hamsters.
How to Add Bedding:
- Start by covering the bottom of the cage with bedding material, ensuring it’s evenly spread.
- Pile the bedding higher in one area to encourage your hamster to dig and form tunnels.
Step 3: Add the Burrow Starter Structure
A burrow starter helps guide your hamster’s natural instinct to dig and nest. Depending on the starter you choose, this can range from hideouts with tunnels to cardboard tubes or even DIY structures.
Hideouts with tunnels: Place these starter structures in a corner or central area of the cage. If they are connected to tunnels, position them so your hamster has easy access to explore and move between areas.
Plastic tubes: You can create a simple tunnel system by connecting clear plastic tubes. Ensure the tubes are wide enough for your hamster to comfortably move through, and avoid sharp edges. If possible, place the tubes at different angles to create an interesting network.
Cardboard boxes: If using cardboard, cut out openings or doors to create tunnels or burrow entrances. Arrange them in a way that your hamster can easily climb in and out.
Wooden blocks: Place hollow wooden blocks or caves in a corner of the cage, ensuring they are easily accessible and allow your hamster to move in and out freely.
Step 4: Add Nesting Materials
Hamsters need soft materials for nesting and creating comfortable sleeping areas. This encourages them to feel safe and secure in their burrow.
Shredded Paper: Shredded paper is an excellent choice for nesting, as it’s soft, absorbent, and safe for your hamster.
Hay: A small amount of hay can be added to your hamster’s burrow. It helps create a cozy nesting area while providing them with something to chew on.
Cotton Fleece: Small pieces of fleece or fabric can also work well, but make sure your hamster doesn’t ingest them. Always supervise when using fleece.
How to Add Nesting Materials:
- Place the nesting materials in one corner of the cage or under a tunnel system. Your hamster will instinctively make a nest here.
- Don’t overstuff the area—provide just enough material for your hamster to create their own nest.
5. Position the Burrow Starter Correctly
When placing your burrow starter in the cage, consider your hamster’s needs and behaviors. You want to make sure that the burrow starter is positioned in a way that maximizes comfort and accessibility.
If using a hideout or plastic tube system, place it in a corner of the cage. This gives your hamster a sense of security and allows them to use the structure as a base for creating additional tunnels and nests.
Don’t overcrowd the cage with too many items. Ensure that there’s enough space for your hamster to move around freely and for the burrow starter to serve its purpose without disrupting the hamster’s comfort.
Step 6: Monitor and Adjust
Once everything is set up, let your hamster explore its new burrow environment. Observe how it interacts with the setup:
- Does it immediately start digging and burrowing?
- Does it use the tunnels and hideouts?
If the hamster seems uninterested or cannot burrow properly, you may need to adjust the depth of the bedding or the placement of the tunnels. Be sure to keep the bedding fresh and clean. Spot clean daily and replace the bedding entirely every week to maintain a healthy environment for your hamster.
Additional Tips:
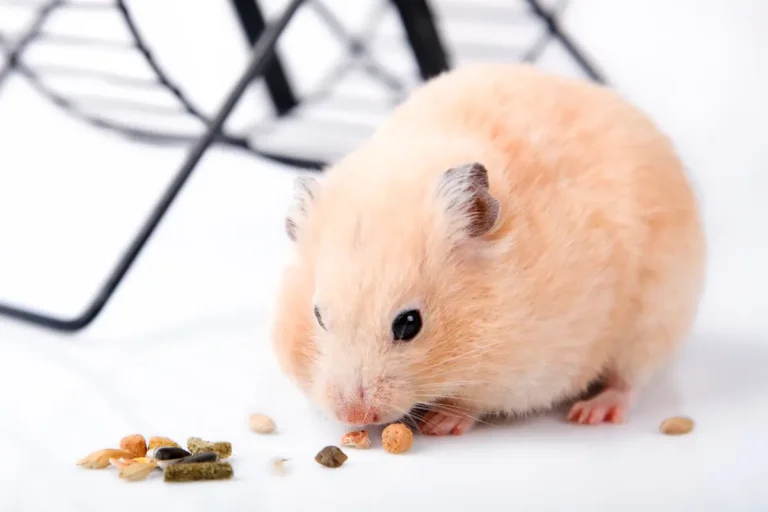
- Hiding Food: Hamsters love to store food, so consider hiding some of their favorite treats in different sections of the bedding to encourage their natural hoarding instincts.
- Rotate the Setup: Occasionally change the layout of the tunnels and hideouts to keep the environment interesting and prevent your hamster from becoming bored.
With a few simple steps, you can ensure that your hamster has a stimulating and comfortable living space that promotes their health and well-being. Enjoy watching your hamster dig, explore, and make their burrow their own!